Vehicles/Engines Related to this:
Holden/Daewoo
Cielo, Espero, Kalos, Lacetti, Lanos, Nubira,
1.4 16V, 1.5 16V, 1.6 16V
Various engine codes
Gates Timing Belt & Component Kit Part Numbers: T310, TCK310, TCKWP310
Failure Mode:
Due to incorrect installation practices the above timing component kits are among the most common kits to encounter premature system failure.
These failures are easily avoided by simply following the OEM recommended installation procedure and being aware of the common mistakes that are made which ultimately lead to expensive engine repairs.
The following information points out the common errors made when installing these components we also provide a detail guide of how to correctly install these parts avoiding premature system failures as well as a brief conclusion along with valuable information relating to counterfeit tensioner units that are making their way into the market.
Key Considerations for installers:
Strictly follow Procedure
Drive failure on the above mentioned engines can be avoided by strictly following the correct installation procedure.
The Water Pump
Drive failure is mainly caused by not rotating the water pump to set the belt tension.
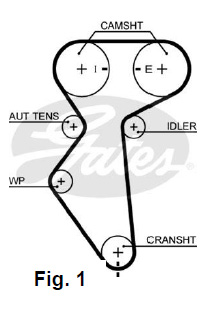
Although the drive is equipped with an ‘automatic’ tensioner, this still has to be set up correctly. And this requires manipulation of the unconventional water pump, located just below the tensioner. (Fig. 1)
Some mechanics hesitate to loosen the water pump, as they are concerned about water leaks, or do not have the proper tool to rotate the water pump. However, in this case, loosening the water pump is vital in order to reach the correct installation tension. (A new O-ring may be needed)
The Tensioner Bolt
Also, leaving the old tensioner on without loosening the tensioner bolt is not the correct procedure to follow.
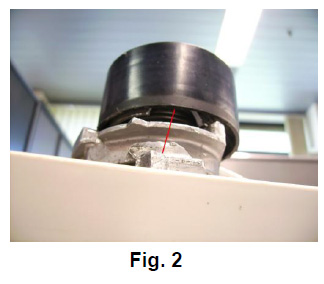
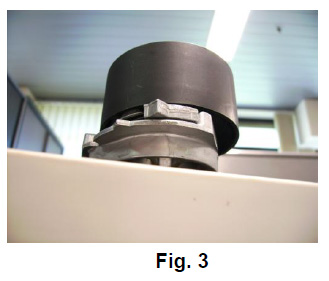
If the tensioner bolt is not loosened, the pointer of the tensioner will hit the cold stop violently. This could seriously damage the pointer, resulting in a rupture (later on). Proceeding this way, in order to be able to install the new belt, the pointer of the tensioner has to be pushed back. When trying this with a
screwdriver, you risk that the screwdriver will slip off the pointer (because of the high spring tension) which will again hit the cold stop. Fig. 3 shows where the pointer is situated on a good tensioner (in its rest position).
Cold Engine
In some cases the timing belt is installed on a hot engine. It is clear this may lead to premature drive failure, because tensioner set up procedures have been developed for cold engines.
Note: It is strongly recommended to replace the tensioner and idler together with the belt, as these parts are wear items they must be replaced at regular intervals. A worn bearing (loss of grease, seizure, misalignment etc.) is just as concerning as a worn belt, and will lead to premature drive failure, resulting
in serious engine damage.
Correct Procedure
Removal
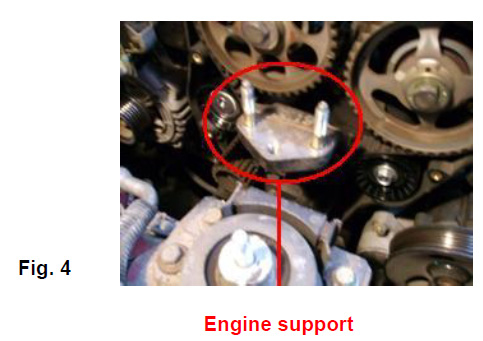
In order to make access to the drive easier, it is recommended to remove the engine support (Fig. 4)
1. Remove auxiliary belt crankshaft pulley, re-install bolt
2. Put engine at TDC: rotate the crankshaft clockwise until the timing mark on the crankshaft gear is aligned with the notch at the bottom of the rear timing belt cover, and align the timing marks on the camshaft gears (Fig 1). Ensure camshaft gears are locked.
3. Slightly loosen the bolts of the water pump
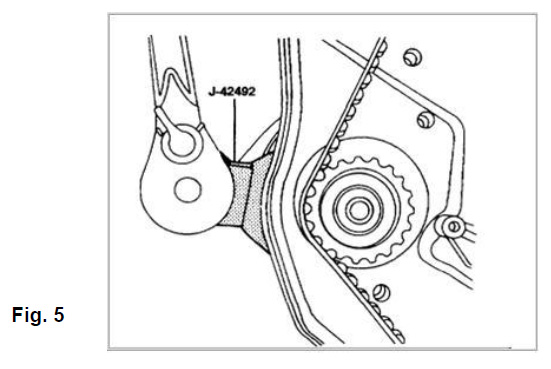
4. Rotate water pump anticlockwise, using special adjustment tool (Gates: GAT V501A or OE: J-42492 or KM-421-A), to release tension on the belt (Fig. 5)
5. Remove the timing belt, tensioner and idler.
Installation
1. Install a new tensioner and idler, and fit the new belt (anticlockwise, starting from crankshaft). Use kit TCK310 or TCKWP310 (includes water pump).
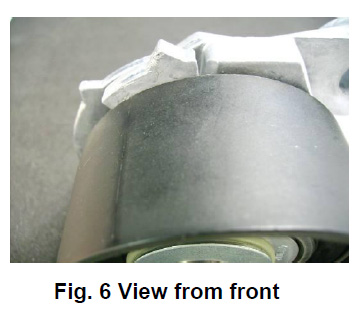
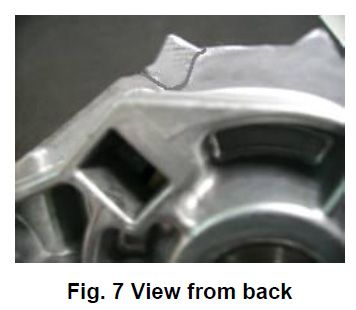
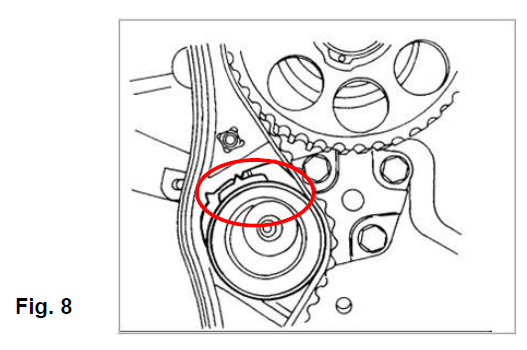
2. Adjust tensioner pointer up to the notch in the tensioner back plate - close to the right hand stop by rotating the water pump gently clockwise (Fig. 6, 7 and 8).
3. Tighten the water pump bolts
4. Rotate the engine two full revolutions clockwise (by rotating crankshaft) until TDC.
5. Slightly loosen the bolts of the water pump
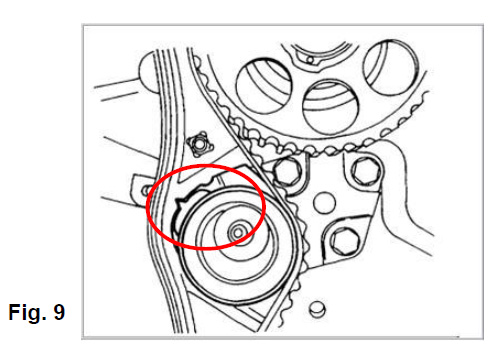
6. Bring tensioner pointer in line with the pointer on the tensioner back-plate by rotating the water pump anticlockwise, with special adjustment tool. (Fig. 9)
7. Tighten the water pump bolts
8. Re-install engine support
9. Re-install the removed auxiliary belt crankshaft pulley
Conclusion

This article was shared with the Mechanic.com.au Community by our Premier Community Partner Gates Australia
To provide feedback, seek further information or ask any questions, don't hesitate to contact Gates Australia
