Finding and effectively sealing leaks can sometimes be frustrating and time consuming. In this article we take a look at the golden rules to follow to eliminate leaks no matter where they are coming from.
Correct Surface Preparation
When cleaning mating surfaces in preparation for a new gasket, try and avoid any hard scraping surfaces (particularly metal) that may gouge or scratch the surface, especially aluminium surfaces like heads, timing covers, water pumps etc.
Aluminum used in engine parts is often relatively soft and vulnerable to damage from poor surface preparation practices.
Deep scratches, burrs or gouges in a mating surface can create escape paths for fluids even when a thick gasket and/or sealant is used.
Despite the convenience and time saving, It is also advisable to avoid buff pads or ‘whizzy wheels’ driven by an air gun or electric tool where possible as they can often cause inconsistencies in the mating surfaces.
Follow OE specs
In some instances where a components original fitment was a ‘form-in-place’ sealant, on occasion when that part is replaced, an o-ring or gasket is fitted.
This can cause misalignment of bolt holes, fluid leaks or proximity issues when the component is a sensor or similar.
On the other hand, a component that was designed to use an o-ring or gasket may not seat properly with the sole use of a sealant.
Having said that, there are many instances where a sealant can be successfully used in place of a conventional gasket, so long as the torque and clamping load doesn’t move the component too close to the opposite mating surface. Conventional gaskets not only provide sealing between mating surfaces, but may also provide a specific spacing as well.
As an example of where this might be an issue, let’s take the camshaft caps on an OHC engine that requires no sealant between the caps and cylinder head. If a conventional gasket was placed between the caps and head, this would raise the caps up, creating an out-of-round and excessive oil gap between the camshafts journals and bores.
Sealing problem areas
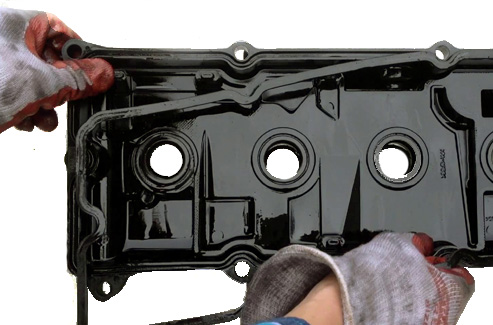
Upon installation of formed bead gaskets as used on many rocker covers and intake manifolds, it is good practice to apply a thin layer of white lithium grease or similar to aid in keeping the gasket in place on installation as well as helping it settle into place which will avoid a pinch on unseated gasket.
Before installing these types of gaskets into the retaining grooves on a rocker cover or similar, ensure that these grooves are perfectly clean and free of any dirt or residual gasket etc.
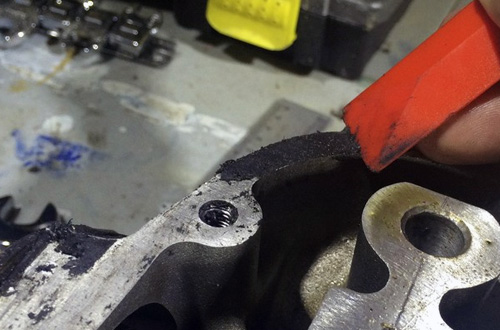
Another important area is the where these types of gaskets intersect, such as where a timing cover meets the block and sump. It’s often a good idea to apply a small dot of sealant in these intersecting areas to prevent a potential oil leak.
Damaged Mating Surfaces
Whilst the ideal solution is always to replace a damaged component, factors such as budget, practicality or time may prevent this option. In these instances, the use of a sealant can be a reliable rescue, but it is absolutely imperative to use the correct sealant for the job!
This will all be dictated by the location, operating temperature, pressure and gas/liquids the sealant will interact with. Not all sealants and threadlockers are the same, with some being tailored for very specific applications, which makes them very ineffective at others.
Leading sealant manufacturers have a range of in-depth application charts both available online and in hardcopy that are a great way to ensure the correct sealant for a job is used.
When we are dealing with leaks such as an exhaust, we may have a situation where an exhaust manifold is not mating correctly to a head, maybe caused by previous overtightening etc.
In a perfect word we would remove the head and exhaust manifold and have them resurfaced, but as mentioned above, it’s not always a perfect world.
A high temperature sealant that contains copper is often successfully used to remedy these small leaks provided the normal preparation practices are adhered to. (Clean surfaces etc.)
Threaded connections
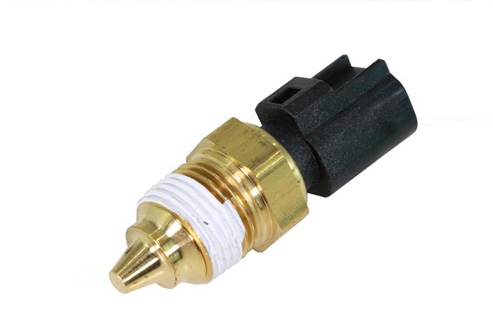
Any fitting or sensor with a tapered thread (such as NPT) requires a thread sealant like Teflon or PTFE (Polytetrafluoroethylene). In the instance of a straight thread, the fitting or sensor may require a sealing washer and/or thread sealant. Subject to the application, this may be a soft-metal crush washer or even just a rubber o-ring; however in this instance a sealant should not be applied, but rather a film of oil. Where a sealing washer is required, again, it is imperative that the mating surfaces are clean and free from burrs or other inconsistencies that may affect the sealing qualities of the washer.
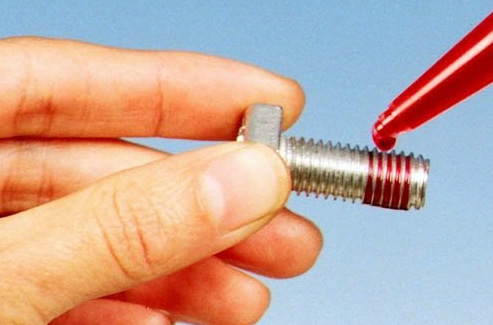
Threaded fasteners
As well as torquing to specification, some fasteners may also require locking, which is usually taken care of using a spring washer. In the absence of a spring washer, a thread locking compound may be required to prevent the fastener from coming loose due to vibration or thermal cycling.
Thread locking compounds are usually anaerobic, meaning that they cure when no air is present which is coincidently when a fastener is tightened.
Again, it’s important to select the correct compound for the job, both in terms of chemical and heat interaction but also locking strength.
Finally, something many mechanics are guilty of is drowning a bolt or fastener in thread locking compound! A dot or two is more than enough to suffice in most applications.
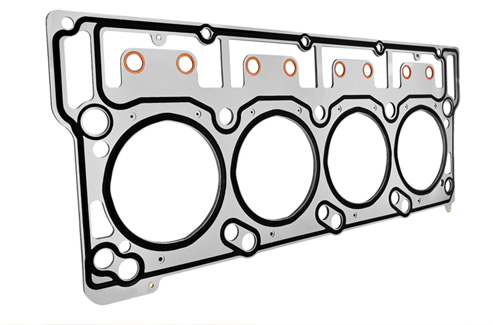
Bead-type (Formed-in-place) gaskets
A lot of modern gaskets are comprised of a metal body with a cnc-printed elastomer or silicone sealing bead situated on each side of the gasket. Whilst the metal body often acts as a stopper to prevent overtightening, it is often best practice to replace these gaskets when the connection is broken to be on the safe side. These types of gaskets are used in a myriad of applications from inlet manifolds to cam retainer plates, sumps and water pumps.
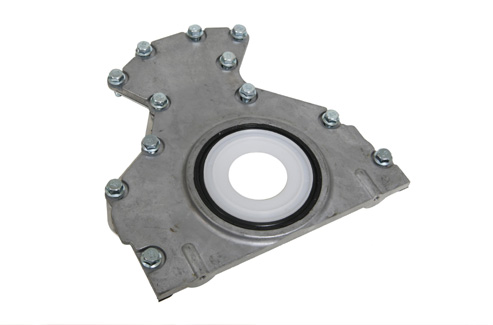
Rear main seals
Thankfully today, most rear-main seals are a simple one-piece design, whether they are installed to the rear flange of the crankshaft or captive to a rear engine cover. Either way, they are rarely a simple job to replace so it's important to make sure they don't leak with one key observation being ensuring the seal orientation is correct so that the angled sealing lip faces inward to the engine.
Using the LS engine as one example, the rear main seal is installed to the rear engine cover, with the seal engaging the crankshaft flange during installation of the rear cover. A nylon guide ring is installed to the inside diameter of the seal and as the rear cover is installed, the guide ring keeps the inboard seal lip facing forward. When the cover is fully installed, the guide ring pops off.
When installing this type of seal, contrary to habit, the seal lips should not be lubricated prior to installation to the crankshaft. After the rear cover is fitted up hard against the block, carefully inspect the seal to verify that the lip has not been pulled backwards. If it has, remove the cover, reinstall the nylon guide ring and re-install the rear main seal.
