Given that the head gasket is one of the most critical and time consuming gaskets to replace on an engine, we felt it deserved it’s own article.
The 3 key things we need to be mindful of when it comes to successful head gasket replacement are correctly prepared deck surfaces on both the block and the head/s, use of the correct type of gasket and that the correct clamping force is administered.
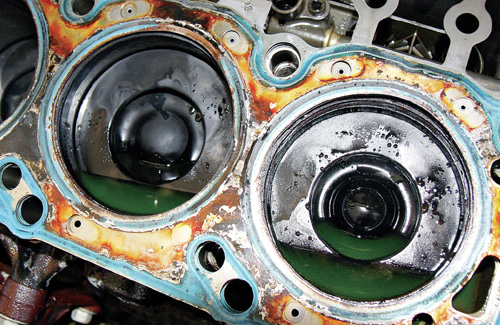
Internal gasket leaks can allow coolant to enter the combustion chambers and oil galleries. If coolant is allowed to enter the combustion chambers, aside from the engine consuming coolant, the steam that is created inside the combustion chambers can increase cylinder pressure and cause damage to pistons and valves. Coolant entering the engine's lubrication system will reduce the oil's ability to properly lubricate components leading to further engine damage.
Composite Head Gaskets
The classic composite head gasket is a compressible flat gasket. It consists of a metal carrier sheet onto which the composite material is rolled on both sides. Metal beads also known as fire rings seal the combustion chamber and protect the composite material from overheating. The material surface is impregnated to prevent the gasket swelling when it comes in contact with liquid such as oil and coolant.
While applications for composite head gaskets continue to exist, the majority of production and performance engines now use MLS (Multi-layer Steel) gaskets.
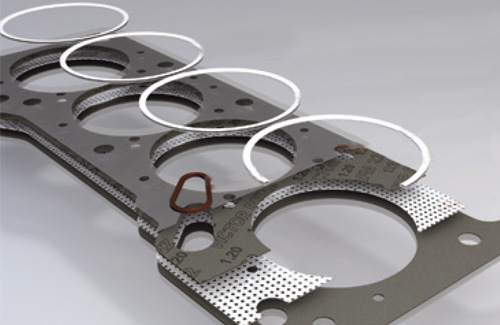
Multi-layer Steel (MLS) Head Gaskets
MLS cylinder head gaskets have been used by vehicle manufacturers since around 1990 and are commonplace in todays engines.
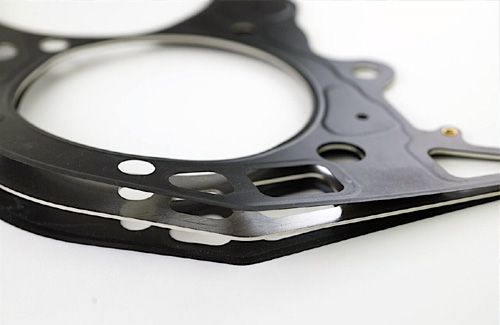
Unlike a composite gasket, MLS gaskets consist of multiple layers (generally three to five) of hardened stainless steel, featuring embossed layers on the outside and passive/stopper layers on the inside which are not embossed. The embossed layers have raised areas that provide sealing, with the stopper layers providing both a dead stop during clamping which prevents over-compression of the gasket, as well as the desired gasket thickness.
The embossed layers (also referred to as ‘active layers’) compress and expand as the cylinder head tries to lift off of the deck during combustion, essentially acting as a spring to maintain constant sealing between the head and block deck.
Given the tough job of the MLS head gasket, a plain stainless steel gasket surface is not enough to create a perfect seal, even on freshly decked surfaces. In order to ensure a perfect seal, a special coating is applied to the outer surfaces that fills the microscoping inconsistencies that exist in the deck surfaces.
In the earlier MLS head gasket-equipped engines, this special coating was sticky and technicians therefore had to be careful when handling the gaskets to avoid causing a defect by way of airborne particles, dirt or fingerprints etc. This is no longer the case with most MLS head gaskets.

Roughness Average (RA)
Roughness Average is calculated by measuring the microscopic peaks and valleys in a surface. This can be accurately carried out using a Profilometer, a specialised piece of electronic equipment to accurately measure surface roughness or a surface roughness comparator, which is essentially a sample of different surface roughness grades.
Roughness Average (Ra) is the unit of measurement commonly used to grade the surface finish on a cylinder block or head. A lower Ra indicates a smoother finish with less deviations between the low and high spots in the surface, whilst a higher Ra is indicative of a rougher surface.
For example 5 Ra would be comparable to a mirror-like finish where as 100 Ra would be indicative of a roughly machined surface.
Whilst proper machining should call for a surface finish of up to 30 Ra, MLS gaskets used in vehicle applications today are generally capable of sealing a finish of up to approximately 70 Ra. This is attributed to the advancements in gasket technology.
MLS gaskets should, in most cases be installed dry. Copper sealants and similar can often dry too quickly and create high spots in the gasket and cause issues.
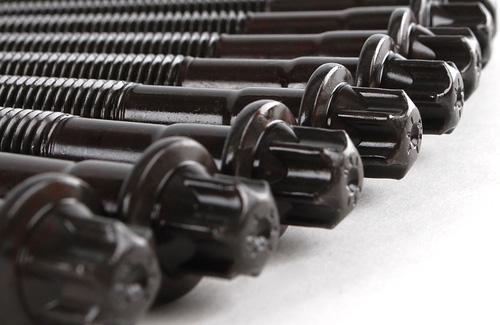
Head bolts
It doesn't matter how smooth our deck surfaces are or how good our gasket is if we don’t pay attention to the key factors of the head bolts (or studs); thread quality, lubrication and tension.
Make sure, when carrying out any head gasket replacement, to clean the threaded holes in the block deck to remove any contaminants and thread deformation. Be sure to use a chaser tap to clean female threads. Unlike a standard cutting tap, a chaser tap is designed to clean and restore existing threads without removing material.
If the block deck has been resurfaced, make sure that the top of all female bolt holes are slightly chamfered to remove any possible sharp or raised edges which could potentially be drawn upwards above the deck mating surface.
The elasticity and tensile strength of head bolts are very important as they are designed to stretch and provide clamping force. Whilst we may think the are just tightened and then sit there for hundreds of thousands of kilometers, they are exposed to dynamic forces as the head tries to pull away from the block during engine operation as mentioned previously with respect to MLS gaskets. This requires the bolts to be somewhat elastic as they are tightened, but if tightened too far, they will stretch beyond the elastic range into a yield, at which point they lose their ability to clamp.
Many engines today utilise torque-to-yield bolts which as most of you reading this will be aware, should never be re-used. Even in instances where you are unsure if the engine you are working on is equipped with torque-to-yeild bolts, it is good practice to replace cylinder head bolts when carrying out a head gasket replacement.
When installing head bolts, it’s important to lubricate the bolt threads, the underside of the bolt head as well as each side of the bolt washers. In some instances, manufacturers will provide varying torque specs depending on the type of lubricant used! Whether that simply be engine oil or a moly based lube which will often specify a slightly lower torque due to reduced friction.
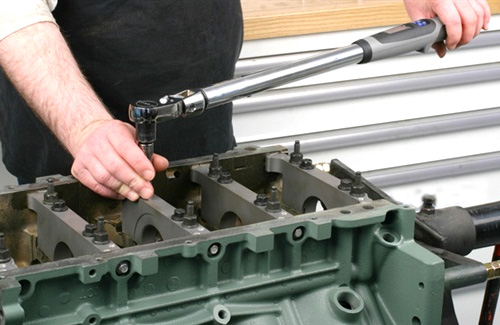
Most head clamping procedures will simply call for a torque value and tightening sequence or in some instances torque plus angle.
The best method for torque plus angle applications is without doubt using an electronic torque wrench that monitors both the torque and the angle and notifies the technician using audible, visual and/or vibration signals.
Alternatively, once torqued using a conventional torque wrench, you can mark the bolt with a paint pen or one of the tool hacks from this article and then visually monitor the angle.
Top Tips
Before removing a head gasket, try to identify the location of the leak clearly.
Analyse the damage and determine the cause – the gasket is not necessarily the source of the problem.
Remedy the cause of the damage to prevent subsequent problems.
Always observe the manufacturer‘s installation instructions
