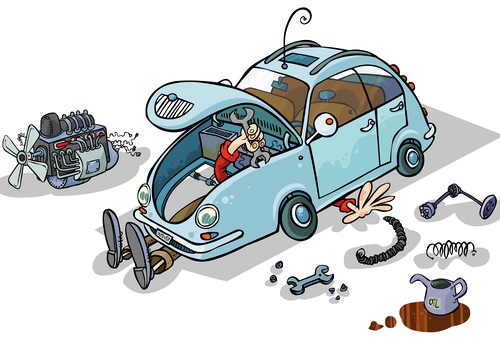
What do you, as a consummate professional technician see when you look at the cartoon image above? While there are no prizes for guessing correctly, there are several possible scenarios that might describe the situation; one being that a trainee mechanic is being eaten alive by a car he has no knowledge of. Another might be that a junior mechanic is trying to find the cause of the problem by throwing parts at it, and yet another might be that the mechanic does not have sufficient information about the problem, so he takes the car apart hoping to stumble upon the solution. The cartoon itself might be somewhat amusing, but if we were completely honest with ourselves, we would have to admit that most of us have been in similar situations at some point in our careers.
However, let’s not dwell on the past unnecessarily. Instead, let us use this article to improve our general diagnostic skills on the one hand, and see how we can derive the maximum amount of information from one of our favourite activities, which are the test drives we love to do to figure out driveability issues, on the other. Let us start with this statement-
Test drives are great when you can you can use your “seat-of-the-pants” diagnostic skills to diagnose knocks, thuds, and odd vibrations in steering and/or suspension systems. In fact, most of us can diagnose these kinds of issues with our eyes closed, in a manner of speaking, and the time spent on a test drive is often time well spent.
However, diagnosing drivability issues such as hesitation upon acceleration, loss of power, surging, and others requires a different approach. While it is often possible to replicate the customers’ concerns, many technicians are often none the wiser as to the actual cause(s) of the problem after a test drive. In today’s professional environment, statements like “It could be this, or if it’s not this, then it must be that” just does not cut it anymore, and besides, guesswork is the very last thing your customer wants to hear.
What you customer wants to hear is you saying that you are top of the issue, and although the customer may not always understand what you are talking about, it is more important for you, the technician, to know what you are talking about when you discuss the possible causes of the problem with him/her. Fortunately, there are two easy ways to gather the information you need to add weight to what you are saying; one is to use your brain, your most valuable diagnostic tool, and the other is to-

The capabilities of scan tools have increased dramatically over the past decade or so, and even mid-range tools can now gather immense amounts of diagnostic data that can be saved and analysed back in the workshop. Let use a practical example; for instance, let’s say you are presented with a vehicle that exhibits a marked hesitation throughout the engine’s operating range. According to the customer, the symptom first appeared a few weeks ago, and while it has not gotten worse, it is not improving either. Simply driving the vehicle under conditions that duplicate those that the customer usually drives under will merely tell you that the problem does indeed exist; it won’t tell you much else- even if you do manage to extract fault codes.
In cases like this, you need to know some fundamental things, such as how well the engine breathes, and how well (or otherwise) it is being fuelled. In short, you need to know if the ECU is always in full control of the fuel injection and ignition timing systems. Thus, if you hook up an oscilloscope to the vehicle during a test drive, you can capture the live data you need to understand what is going on with the vehicle.
Ideally, you want to see how the oxygen sensors behave under various conditions. For instance, and since the ECU’s on most vehicles fall out of closed loop operation under WOT (Wide Open Throttle) conditions, the oxygen sensor(s) should register a full-rich condition under aggressive acceleration. Therefore, if the oxygen sensors were fully functional, you would expect to see signal voltages above the 800 mV to 850 mV range, and ideally up to about 900 mV. If you do see this, you can eliminate the fuel pump, fuel filter, and defective injectors as probable causes of the issue with a reasonable amount of certainty.
In a similar fashion, you can capture live data on fuel trims. For instance, under steady speed cruising with the ECU in closed loop operation, you should see a relatively stable signal voltage on the downstream oxygen sensor(s), while the upstream sensors should display a cyclical switch between rich and lean. However, this assumes that the fuel trims, both positive and negative, remain within acceptable ranges during normal driving.
If you are new to diagnostics with oscilloscopes, you should bear in mind that fuel trims, both positive and negative, should ideally not exceed about 10% of their specified values during closed loop operation. For instance, gross engine vacuum leaks is a common cause of high positive fuel trims, because the ECU is adding fuel to counteract the lean mixture, while issues like excessive fuel pressure or leaking fuel injectors often cause high negative fuel trims as the ECU is subtracting fuel to counteract the rich mixture caused by high fuel injection volumes.
Of course, there are other causes of excessively high or low fuel trim values, but if you have a scope hooked up to record real-time live data on several other, but relevant PID’s while performing a test drive, you are in a much better position to arrive at valid conclusions on whether or not excessive fuel trims are a cause of the problem, or a symptom of something else.
Making these kinds of distinctions is not always easy, but there is way to remove much of the guesswork. In fact, this method serves as a valuable diagnostic tool in itself, so let us look at-
In engineering jargon, the term “volumetric efficiency” refers to how efficiently a pump moves a volume of gas or liquid that is equal to the pump’s displacement. For instance, if a pump were perfect and there were no frictional losses present, that pump would move a volume of gas or liquid that is equal to its displacement, and its efficiency would therefore be expressed as 100%.
In practice, car engines are pumps of sorts, and therefore, the principle of volumetric efficiency applies to car engines in the same way that it applies to industrial pumps. However, in the case of car engines, we know that are several major sources of friction that influence the flow of gas through both the intake and exhaust sides of the pump (i.e., the engine), and that it is therefore impossible for naturally aspirated engines* to have volumetric efficiencies of 100%.
* Engines with forced induction can have volumetric efficiencies in excess of 100%, since frictional losses that influence the flow rate of the intake air are overcome by the high airflow rates created by turbo-, and superchargers.
As a rule of thumb, modern naturally aspirated petrol engines* that are in good mechanical condition and do not have restrictions in either the intake or exhaust systems, typically have mean volumetric efficiencies that exceed about 70%. Note though that this value is greatly influenced by (and largely dependent on) ambient air temperatures, ambient atmospheric pressure, relative humidity, and engine speed.
* Note that this equation does not apply to diesel engines. Since diesel engines always run with excess air, there is no direct correlation between the volume of air a diesel engine ingests, and the volume of exhaust gas it expels.
Thus, given the above rule of thumb, it should be obvious that the volumetric efficiency of an engine would be good indicator not only of its general condition, but also of the possible presence of restrictions in either the intake or the exhaust systems that could potentially affect the engine’s actual (as opposed to its ideal, or desired) volumetric efficiency.
There are many online calculators available that can do the math for you, but be aware that volumetric efficiency calculators are not created equal. The best ones require inputs on the engine speed, engine displacement, ambient temperature, and barometric pressure (or elevation above sea level) to calculate a precise volumetric efficiency value, so keep this in mind.
NOTE: If the vehicle is fitted with a MAP sensor, you need to set a PID that will monitor the absolute manifold pressure during the test drive, since these values are roughly analogous to the airflow rate in grams per second through a MAF sensor.
Nonetheless, when you hook up an oscilloscope for test a drive, set PID’s to capture the engine speed, the barometric pressure, and the rate of airflow through the MAF sensor in GpS (Grams per Second), and all other information required by your chosen calculator. Note that while fuel trim values and loop status are generally not required to calculate volumetric efficiencies, it is helpful to have these values available for reference purposes.
In order to obtain the widest possible range of data points, perform a long-ish test drive in both city and highway driving conditions. When you get back to the workshop, you will have a virtual movie (in the form of traces) of what was happening with the vehicle, which will be particularly helpful once you calculate the engine’s volumetric efficiency simply by plugging your obtained values into the calculator, which brings us to-
This is where the tricky bits come into play, because it is easy and sometimes very tempting to draw the wrong conclusions if you don’t consider the whole body of evidence you have available. For instance, if your calculator yields a volumetric efficiency of say, only 65%, you have several options to consider, including the following-
MAF sensor data
It has been this writer’s experience that defective or malfunctioning MAF sensors tend to under report airflow, but to be sure if the MAF sensor is actually at fault, you need to check its trace against others, such as the throttle opening and engine speed traces. If the MAF sensor trace follows or broadly matches other relevant traces and data, it is unlikely that the MAF sensor is under reporting airflow.
In such a case, it is very likely that the MAF sensor is reporting the actual airflow rate through it correctly, but that a restriction exists in the intake system that impedes airflow under certain conditions, such as during sudden WOT events. This will almost always be borne out by unexplained dips in the MAF sensor’s output voltage, and particularly with reference to throttle openings.
MAP sensor data
In a fully functional intake system, the manifold pressure would drop to atmospheric pressure, or to very close to atmospheric pressure during a sudden WOT event, and this would be evident in the MAP sensor’s trace relative to other traces such as the throttle opening and engine speed traces.
If however, the manifold pressure does not drop to atmospheric pressure, it means that the MAP sensor is either defective or more likely, that there is a restriction in the exhaust system that prevents the efficient scavenging and expulsion of exhaust gas, which would explain a sudden hesitation or sustained loss of engine power. Clogged silencers and/or catalytic converters come to mind, but this would require additional checks to verify or eliminate.
Oxygen sensor data
As mentioned elsewhere, oxygen sensors should indicate fully rich conditions when an ECU drops out of closed loop operation, but you should resist jumping to conclusions when you find that they do not. In these cases, you should compare oxygen sensor data with fuel trims, which in their turn, should show a correlation with MAF/MAP sensor data, as well as with throttle openings.
Bear in mind though that since some oxygen sensors are negatively controlled, you might obtain an inverted trace as the mixture enriches, so if you find that oxygen sensors appear to be showing lean conditions when they should do the opposite, consult reliable service information to determine how the oxygen sensors are controlled.
Volumetric efficiency values
Bear in mind that volumetric efficiencies are determined by many variable factors, and that any value you obtain today might not be reproducible tomorrow or the day after. However, and even though volumetric efficiency values should not be taken as the be-all and end-all of automotive diagnostics, any such value on a naturally aspirated petrol engine that approaches, or falls below about 70%-75% or so should be taken as a sign that the engine is not breathing freely, which leaves us with this-
If you are new to diagnostics with oscilloscopes, all of the above might still sound like “Well, if the problem is not this, it must that or perhaps the other thing”. However, the thing to remember here is that if you had set up a scope intelligently during a test drive, the diagnostic data that represents “this, that, or the other thing” will be available to you in a form that is not possible to obtain in any other way.
Freeze frame data might be useful in some cases, but unlike scope traces that show how one or more operating parameters changed relative to each other in real time, freeze frame data is at best analogous to a snap shot that captured a one dimensional view of a complex panorama whose depth and detail changed several times per second during the test drive.
As a practical matter though, we hope that this necessarily brief discussion of how an oscilloscope can help you nail down some driveability issues will inspire you to learn new diagnostic methods on the one hand, and to use the time spent test driving cars more profitably, on the other.
