As the weather warms up, we thought this would be a good time to talk cooling systems; one of the most critical players when it comes to engine longevity. One where special attentions needs to be paid to both the quality of the parts we use as well as the quality of our workmanship to ensure years of trouble free service.
While cooling systems may be something we have all been working on for many years, let this serve as somewhat of a refresher with respect to preventative maintenance, service and troubleshooting. If you have any practices that differ from those listed below or anything to add to the list, be sure to post in the Mechanic.com.au Private Facebook Group. (Members Only)
Coolant
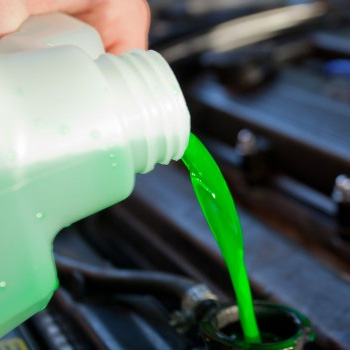
Generally speaking, a 50/50 mix of water and ‘antifreeze’ is the recommended norm, however there are numerous different coolants with varying concentrations on the market.
Unless the coolant you decide to use is pre-mixed (and therefor can be filled directly into the cooling system), avoid using tap water as it can contain excess calcium or other materials which can promote corrosion. Be sure to only use distilled water when filling vehicle cooling systems.
Given that proper flushing and refilling of cooling systems probably isn’t carried out as often as it should be today, it’s important to educate your customers around the critical nature of maintaining a healthy cooling system. The beginning of a hot aussie summer is a prime time to do so as part of a routine vehicle service or complimentary cooling system inspection.
Using only water or a diluted mix of the original coolant can erode aluminium surfaces as well as allow rust to build up in cast iron passages.
Over the past few years, there has been a proliferation of coolant colours, including green, pink, orange, gold, yellow and blue. This is in an effort to aid in the identification of the various compositions of coolant for the modern vehicle.
The colour is generally used to identify the type of antifreeze. IAT (Inorganic Acid Technology) is green. OAT (Organic Acid Technology) can be orange, red, green, pink or blue. HOAT (Hybrid Organic Acid Technology) is usually orange, gold or yellow, but may be found in green, pink, blue or red.
Formulations of coolant can vary in terms of corrosion inhibitors and the degree to which they conduct what is called electromechanical degradation (higher electromechanical degradation creates an electrical charge like a battery which can degrade metallic and rubber surfaces). For this reason, when it comes to selecting and using the correct coolant, stay on the safe side and use your preferred coolant providers product selector.
As most of us will be aware, coolant with ethylene glycol is very toxic if ingested and can lead to kidney failure. Because ethylene glycol has a sweet smell/taste, it can lure an animal or a child to drink from an open container. A much safer alternative is propylene glycol however it reportedly has a shorter life-span as well as higher associated cost. For this reason, a bittering agent is often added to ethylene glycol coolants to prevent accidental ingestion.
Finally, when changing coolant types always be sure to thoroughly flush the cooling system including the heater core and never mix dissimilar coolants.
Hoses
Not all hoses are made equal, therefore in order to ensure a reliable cooling system it’s important to use quality hoses.
For extreme heat applications like performance and turbocharged engines, an upgrade to consider is silicone coolant hose which are ideal for coolant hoses that are located in close proximity to turbochargers or areas with high levels of seat soak or poor air flow.
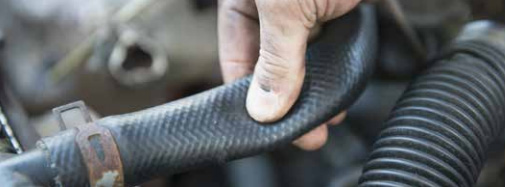
Beside obvious damage to hoses such as abrasions or pinholes, it’s not uncommon for them to dry out and crack due to the effects of thermal cycling, UV damage and general degradation over time, especially on the inside. The easiest way to identify an unserviceable coolant hose without removal is to squeeze it, especially at the bends.
If the hose feels hard and brittle and/or makes a crunching noise when you squeeze it, it’s due for replacement.
Conversely, if the hose feels overly soft and squishy or is bulging at the hose clamps, it’s also time for the bin!
Thermostat Housings
It’s becoming a lot more common to see plastic thermostat housings these days and while they don’t suffer the same corrosion issues a cast aluminium or steel unit would, they are susceptible to cracking so be sure to carefully inspect them for hairline cracks.
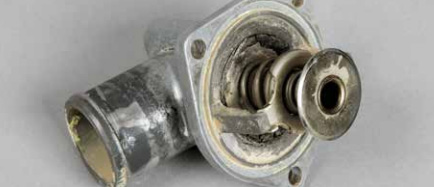
It’s often interesting what some technicians still consider consider ‘Good to go’ when it comes to buffing their metal counterparts. As a rule of thumb, if there is ANY pitting on the mating surface of the thermostat housing or corrosion of the outlet, it’s time for replacement.
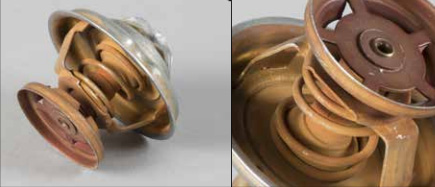
Thermostats
Thermostats often feature a wax-filled copper housing that pushes the thermostat open against spring pressure. As engine coolant temperature rises to a set point, the wax melts and expands which pushes against a small piston and opens the coolant path in the thermostat. As the coolant temperature begins to drop, the wax contracts, allowing spring pressure to close the thermostat.
An often overlooked effect of an engine overheating is a compromised thermostat spring, resulting in abnormal engine operating temperature or erratic fluctuations as the thermostat opens or closes due to a heat-damaged spring.
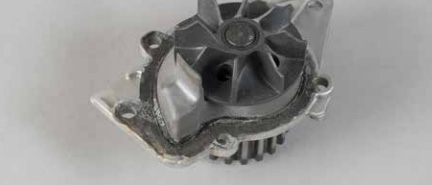
Water Pumps
The water pump is the driving force behind an engines cooling system. The ability of an engine to circulate coolant is the prerequisite to the proper function of all other components in the cooling system.
Given that many water pumps today live behind the timing cover, it’s often good practice (depending on the interval) to include water pump replacement as part of a timing belt service. Avoiding replacing the water pump at this time may result in having to complete what is essentially the same job again in the event it begins to leak or a bearing fails.
In instances when dealing with an external accessory belt driven water pump, when it comes time for replacement, consider the related components that work in conjunction with the water pump as part of a system package. This includes the drive belt, pulley, belt tensioner and any other idler pulleys that may be involved. If however many kilometers have resulted in failure of the water pump, the same time and wear cycles may have been experienced by the belt and associated components (dependant on previous possible replacements). It just makes sense to replace the entire system of parts that directly relate to the pump, even if the items show no immediate failure symptoms.
Explaining it in this way to the customer may assist with gaining approval. Remember, half of the sales process is about education. Elimination of worry and avoidance of potential future problems is well worth the investment.
While we focus on water pumps, lets not forget about electric water pumps which are becoming more and more common. Many of these water pumps are capable of some level of self diagnosis. Conditions monitored include pump current, speed and voltage.
Be aware that some engines (such as BMW) are equipped with an electric water pump.
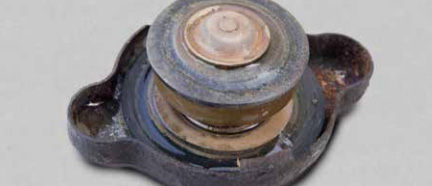
Pressure Caps
Engine cooling systems are kept at a specific amount of pressure to raise the boiling point of the coolant. This pressure generally ranges from 9 to 16psi.
As a cooling system soaks heat, it expands creating system pressure. When the cooling system pressure reaches the caps rating, the valve opens, allowing the coolant to overflow. When the system cools, a vacuum is created that allows any of the overflow to return to the radiator. This is what we commonly refer to as a ‘recovery system’
Why is the pressure cap always at the highest point of the cooling system?
If the cap needs to open and vent because of excessive pressure, any air in the system will escape first prior to any loss of coolant.
Radiator Fins
Put your compressed air nozzle and hose away, at least until you have turned down the pressure on your tap or regulator. All too often radiator fins are damaged by excessive air/water pressure as well as the angle at which it is applied.
Cooling fins are delicate, especially on modern aluminum heat exchanges so be sure to be gentle when cleaning them. Always attempt to clean from the ‘engine side’ so effectively in the opposite direction to airflow and always try to aim directly at/through the fins rather than at an angle.
In our experience, radiator fin straighteners rarely work effectively and prevention is always better than cure!
Also in the event you are unable to remove the heat exchanger (radiator or otherwise) that you are cleaning, be sure to check for debris between it and any condenser, intercooler etc.
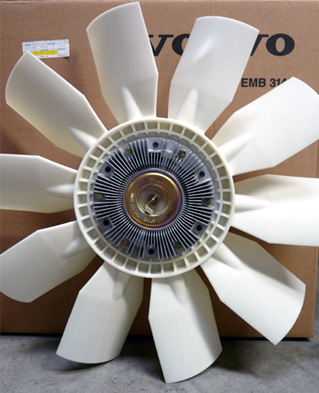
Cooling Fans
In the presence of a mechanical fan, clutch issues are all too common. Physical damage to the fan including bent and broken blades can not only affect it’s ability to circulate air but can also cause unwanted harmonics and vibrations which can cause premature wear of water pump components.
In the presence of electric thermo fans, be sure to comprehensively check all fan speeds using a scan tool actuation test as well as checking that the fans cycle under normal operation too.
Bleeding
Why are airlocks such an issue in cooling systems?
These pockets of hot steam can cause damage to heads and head gaskets, distorted bores and piston ring distortion, cracked blocks and heads and much more.
In the same we we need to evacuate air from a hydraulic system like brakes for proper operation, the same must be done in a cooling system.
In some instances, a bleeder valve is present. In this case, open the bleeder valve when filling the engine when cold until a steady stream of coolant streams from the bleeder and then tighten the valve. Use of a bleeding/filling funnel is often a very effective way to eliminate air locks. Once the engine is warm and the thermostat has opened, remove the funnel and quickly secure the radiator cap.
In the event the vehicle has a ‘header tank’ type system, they are often ‘self bleeding’. After slowly filling the system, running the vehicle with the pressure cap off until the thermostat opens is often effective.
As with every vehicle, follow the manufacturer's instructions when it comes to cooling system bleeding as they can vary drastically from above. Here is a prime example from a BMW equipped with an electric water pump!
Open the bleeder on the header tank (if equipped)
Fill the header tank slowly with coolant.
Close the bleed screw as coolant begins exit the bleed screw.
Once the bleeder on the header tank (if equipped) flows coolant and has been closed, fill the header tank to the lower edge of the filler neck.
Install the coolant pressure cap.
Connect a battery charger to the battery or jumper points.
Push the START button but do not depress the brake or clutch pedals. This will turn the ignition on but will not crank the engine.
Set the heater temperature to max and blower to the low speed setting.
Press and hold the accelerator pedal to the floor for 10 seconds.
The self-bleeding procedure will begin via the electric water pump and will run for 12 minutes. During this time, the water pump will alternately turn on and off. DO NOT remove the cap while the bleed sequence is running.
When bleeding is complete, check coolant level and add if needed, and replace the pressure cap.
In the event that during a road test the temperature gauge operates in the normal range and suddenly rises and drops back to normal it is very likely that there is an airlock present and the system should be re-bled.
