In two previous articles, we discussed the general operating principles of the superchargers on Volvo T6 engines, as well as the need to be extra careful when making diagnostic inferences when you encounter a suspected supercharger failure. Several conditions can mimic the effects of a supercharger failure on a T6 engine, so in this article, we will discuss the most efficient way of confirming or eliminating supercharger failures as the cause of trouble code P0171 and other air/fuel metering-related trouble codes. Let us start with this statement-
The problem with even small intake leaks on T6 engines is that such leaks often have a disproportionately large effect on the overall efficiency of the intake system. Moreover, all intake leaks allow unmetered air to enter the engine, and if the leak is big enough to affect the air/fuel mixture, the ECU will a) set a lean running code, and b) add more fuel to the mixture to counter the additional air.
If you have access to freeze frame* data, you will see this adaptation in the LTFT (long-term fuel trim) values, but sadly, freeze frame data tells you nothing about the site of the intake leak, although the magnitude of the LTFT adaptation(s) can tell you something about the size of the leak. As a rule of thumb, though, the bigger the intake leak, the bigger the LTFT adaptation(s).
* Note that freeze frame data can only be accessed with Volvo's VIDA software that runs on a suitable laptop computer.
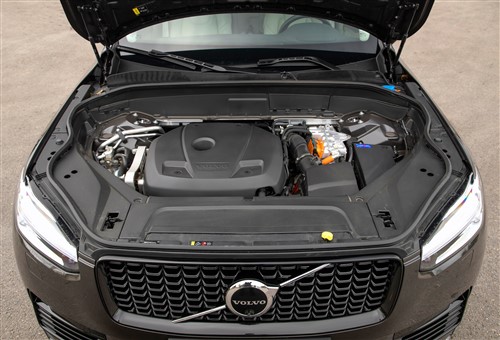
However, as a practical matter, it is almost impossible to detect and pinpoint small leaks in the intake and larger forced induction system on T6 engines without using a high-capacity diagnostic smoke machine. The problem with most intake leaks on T6 engines is that they happen in the intake ducting behind the engine, between the engine and the firewall, where working space is limited, to say the least.
Therefore, the obvious thing to do is to pump the intake system full of smoke and hope you can see where the smoke leaks from the intake system. In this regard, we recommend that you use a good work light to check for smoke from the top of the engine, and from below the vehicle.
Nonetheless, it is at his point where things can easily go wrong because you need to be sure that you are actually filling the supercharger with smoke. Here is what you need to look out for-
One of the most common causes of intake leaks is a defective diaphragm or check valve in the oil trap. On V50, S40, C70, and C30 Volvos made from 2005 to 2012, a breached diaphragm will make a weird and unmistakable whistling sound, and so if you hear a whistling sound while the engine is running at idling speed, replacing the diaphragm will resolve the problem
However, on T6 engines made from 2016 to the present, the only symptom of a defective oil trap diaphragm will be a lean running code being set and stored, so how do you know if you are dealing with a PCV fault or a supercharger fault?
The most reliable method is to remove the oil filler cap while the engine runs at idling speed. If the oil filler cap comes off easily, the diaphragm and check valve are both good. If the oil filler cap does not come off easily and seems to be welded in place, the diaphragm and check valve are defective and must be replaced. In such a case, the defect in the PCV system is the direct cause of unmetered air entering the engine, and further attempts to diagnose issues with the supercharger should stand over until all defects in the PCV system have been resolved, which brings us to-

When you replace a PCV diaphragm or check valve on a T6 engine, it is crucially important to check that the repair has restored the correct operation of the PCV system because sometimes, there may be a leak in the supercharger as well.
In practice, the best way to check the integrity of the PCV system is to seal both the dipstick tube (if fitted) and the oil filler cap before pumping smoke into the intake system when the engine has reached its optimal working temperature. The next step is to remove the rubber hose from the oil trap: if the oil trap diaphragm is intact, no smoke will emerge from the hose. If, however, any smoke emerges from the hose the oil trap diaphragm is still leaking and the leak should be resolved before any further testing is performed.
Also, keep in mind that the ECU will indicate a lean running condition for as long as a leak in the intake system exists. You can monitor the LTFT continuously with VIDA software, but if you do not have access to VIDA, we recommend that you clear all stored codes and do a long-ish test drive before scanning the vehicle again. If code P0171 or other fuel/air metering codes return, but no smoke or blowby gases emerge from the oil trap hose, there is almost certainly an air leak inside the supercharger.
It should be noted that in the absence of live data provided by VIDA, the diagnostic procedure outlined above should be regarded as a rough guide and not a definitive process that always yields accurate and reliable results. Based on this, we strongly recommend that you have all the control modules in the vehicle scanned with current VIDA software after you have resolved all PCV system issues. What you are looking for is live data on the boost pressure and the status of the long-term fuel trims before you make the decision on-
If live data suggests that the air leak is in the supercharger, you should know that the process of removing the supercharger from the engine is not for everyone, especially if you have big hands. Working space is extremely limited and only quarter-inch drive sockets will reach some fasteners that are hidden in almost inaccessible places.
As a practical matter, removing the supercharger from a T6 engine is a huge and complicated job that can easily take an entire day, and sometimes longer.
Unfortunately, it is not possible to replace any of the supercharger's internal parts without removing the supercharger from the engine, but once you have it out of the vehicle and on the bench, we recommend that you keep some important things in mind before doing anything else, these things being-
The complexity of the supercharger
Although a T6 engine’s supercharger may appear to be a relatively simple device from the outside, the fact is that these superchargers are highly complex mechanisms that contain a large number of rubber, plastic, and aluminium parts, all of which must be in a good working condition if the unit is to work as expected.
Therefore, we do not recommend that you disassemble a supercharger without the benefit of OEM service information that explains each step in the process. Some parts are difficult to remove without special tools, or at least, standard tools that have been adapted or modified to serve as special tools. Also, be aware that it is impossible to remove scratches or burrs caused by heavy-handed methods in internal bores and mating surfaces successfully, so never try to use force to remove any internal part(s).
If you are experiencing difficulty in removing any internal parts from the supercharger the best thing to do is to take a step back and obtain relevant service information before trying to remove the stubborn part again.
Replace all internal parts (except the rotors)
Although not all internal parts are always worn or damaged, Volvo recommends that all internal parts be replaced because some parts may not show visible signs of damage or excessive wear. Moreover, given the sheer amount of work and time required to remove and reinstall a supercharger, it makes no sense not to replace all internal parts that could conceivably cause an air leak.
Toque all fasteners to spec
The importance of tightening all fasteners to spec cannot be overstated. Sloppy assembly and reinstallation of the supercharger can cause severe to fatal damage to both the supercharger and the engine, so be sure to have all torque specs and a properly calibrated torque wrench ready at hand before you begin to assemble the supercharger.
Also, be aware that the supercharger does not simply bolt onto the engine. The unit has to be mounted at a specific height, and while this height can be adjusted, you will need a Volvo special tool (part no 999 7508) with which to rotate a threaded spacer that controls the supercharger’s height. To make things easier, we highly recommend that you mark the position of the supercharger (on the engine) before you remove any fasteners to help you mount the supercharger correctly when you reinstall it.
Verify the rebuild
Once you have the vehicle reassembled, you need to perform a long test drive to make sure the forced induction system works as expected. You will know the repair is successful when no lean running codes come back and the long-term fuel trim values are within specifications as per service information for the specific vehicle, which leaves us with this-
Although the twin-charge forced induction systems on Volvo T6 engines may appear to be impossibly complicated, these systems are actually relatively simple when you mentally separate the supercharger and the turbocharger from each other. Doing this makes it much easier to formulate diagnostic strategies because while each device performs a critical task, they largely do so at different times in the engine’s operating range.
However, while it would be a mistake to underestimate the complexity of Volvo’s twin-charge forced induction system, once you “split” the system into its constituent parts based on the engine speed at which each part comes into operation, it becomes much easier to make accurate and valid diagnoses when something goes wrong.