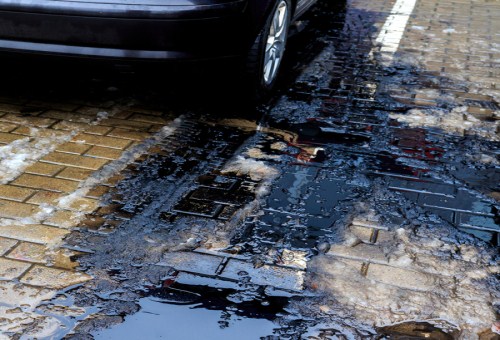

The image above represents any technician’s worst nightmare; oil and other fluid leaks that persist in spite of all reasonable efforts to resolve or repair them. While the above image is an extreme example, recurring fluid leaks have happened to all of us, and it is often very tempting to blame gasket failure, the failure of the gasket maker or sealant, and sometimes even the driver for driving the car wrong. However, fluid leaks are not very difficult to repair, and viewed objectively, recurring fluid leaks are often the result of our failure to read the manual, so to speak.
While this article does not pretend to be a manual, it can be seen as both a crash course in the basics of gasket sealing, and a reminder that we do not always know everything there is to know about fixing fluid leaks; if we did, no vehicle would ever leak anything, so let us start with this statement-
This statement might appear to be counterintuitive, given the large number of vehicles that leak oil and/or engine coolant, but the fact is that if everything on the vehicle is clamped down properly, there can be no leak paths for fluids to escape through. Since most modern engines and transmissions are remarkably leak proof, it is reasonable to assume that leaks develop as the result of sustained vibration that loosens clamped joints, dirty oil that degrades the sealing lips on oil seals, and sometimes, the wrong choices we make with regard to sealing materials when we perform routine servicing and/or repairs.
Gaskets depend on an equal pressure distribution over their entire surface area to work, so if we do not follow proper installation procedures, do not torque down bolts equally, or worse, do not torque down bolts sufficiently, the result is relative movements between the parts of the clamped joints that is aggravated by vibration and differential expansion and contraction rates. Gaskets have a limited resistance to these factors, which means that fluid leaks are almost guaranteed to happen when a gaskets’ structural strength is overcome by conditions or factors that gaskets were neither designed, nor intended to withstand.
Put in another way, gasket failures are induced, and in many cases, we repeatedly replicate the conditions that caused the initial leak, while expecting different results. As stated elsewhere, fluid leaks are not difficult to repair successfully, but doing so requires some understanding of the basics of gasketing best practices, which starts with understanding the definitions of some modern industry terms, the most pertinent of which are explained below-
RTV
“RTV” is an acronym that stands for “Room Temperature Vulcanisation”, which term serves to describe a huge range of gasket makers, gasket sealers, and other compounds that are commonly used in a wide range of industries. As a general rule, RTV compounds only cure in the presence of atmospheric air that contains water vapour, with the concentration of water vapour in the atmosphere determining the time it takes the sealant to cure to full strength.
Anaerobic sealers
“Anaerobic” means “in the absence of oxygen”, and while this class of sealants will not cure if oxygen is present, it also will not cure if is not in contact with metal. Thus, anaerobic sealants will not cure if it is used in joints where the sealant is not in contact with metal on both sides of the sealant film. Also, note that most anaerobic sealing compounds contain substances that attack materials such as paper, cork, and even rubber gaskets/seals on a molecular level and therefore, if this class of compound is used a gasket dressing, much of the degraded material can end up in the engine where it can clog oil and coolant passages.
Bond strength
This term refers to the actual strength of the bond between two surfaces, but note that in automotive applications, this value is usually relatively low.
Tensile strength
This value is particularly important in cases where pressurised fluid passes through the joint, since it is the cured sealing compounds’ tensile strength that keeps the fluids from escaping through the sealant film.
Working time
This refers to the amount of time (after assembly of a joint) that must elapse before the joint can be subjected to a load. For instance, in joints where fluid pressure is present, the manufacturer of the sealer may require a curing time of say, one hour before the compound reaches a certain percentage, typically about 60% of its full tensile strength. Thus, prematurely subjecting the joint to a load could cause the sealant to be forced out of the joint.
Elongation
This refers to the length a sealer will stretch before it breaks. For instance, if the product sheet states that a particular sealing compound has an elongation of 300%, that compound will stretch to three times its original length in its cured state without breaking. This value is particularly important in joints between materials that expand and contract at different rates, such as is the case with aluminium valve covers and cast iron cylinder heads.
Handling time
This is the amount of time you have available between applying the sealant, and assembling the joint. This is important in the case of most RTV sealants, since waiting too long before assembling the joint can cause the sealant to “film over” which has severe negative effects on the bond strength of the sealant.
Wetting ability
This refers to the level of contact between the sealer and the surfaces of the parts to be joined or sealed, and is typically expressed as a percentage. For instance, if a film of oil, dirt, dust, or rust exists between the surfaces to be joined, the oil film will prevent full contact resulting in a low (or zero) wetting percentage, and under these conditions a fluid leak is inevitable, which brings us to this question-
From this writers’ perspective as a former shop owner, there is no single answer that always explains all recurring fluid leaks. However, based on this writer’s observations, mechanics and technicians make some mistakes more often than others, these being-
Taking a one-size-fits-all approach
While nobody can be expected to always be aware of all new advances in chemical engineering as these pertain to automotive gasket sealing, many mechanics tend to choose one particular type (as opposed to a particular brand) of gasket maker/sealant, and to use that product for everything.
In this context, “everything” includes making in-place gaskets to replace paper gaskets, sealing water pumps, sealing inlet manifold gaskets (and sometimes exhaust manifold gasket flanges), using gasket maker as a dressing for paper gaskets, to sealing rubber or silicone valve cover gaskets, “just to be sure it doesn’t leak”. In practice though, each of these applications requires a different product, but in some cases, no sealing product or agent is required, or desirable.
Cases in point would be the following-
Water pumps
Pumps that seal against the engine block with an O-ring use the lateral expansion of the O-ring as a sealing mechanism; if the mating surfaces are in good condition and the O-ring is new, it is extremely unlikely that the joint will leak if the parts are assembled correctly. If the mating surfaces are corroded and the O-ring has hardened, suitable corrective measures must be taken, since using some types of RTV sealants can aggravate corrosion on aluminium parts, or cause corrosion where there was none before.
Using sealants on rubber/silicone gaskets
These gaskets and seals (including O-rings and paper gaskets) depend on both compression and friction to form an effective seal. Since gasket makers and sealants are slippery in their uncured state, the sealant film cancels out the friction component, which can cause fluid that is under even a moderate pressure to seep past the seal. Moreover, most RTV sealing compounds contain substances that attack and degrade rubber and silicone gaskets, with shrinkage of the gasket being a common feature of the degrading process.
This is most commonly seen on steel gaskets (such as some intake manifold gaskets) that come with preformed silicone sealing beads. Applying an unapproved or unsuitable RTV compound to such a gasket will destroy the sealing beads on the steel substrate, which virtually guarantees that that gasket will start leaking.
Other common mistakes include-
Not waiting long enough
We all know that time pressures in a busy shop can be immense, and that technicians are constantly exhorted to get vehicles out of their bays as soon as possible. However, the fact is that most gasket makers and sealants require at least 4 to 6 hours of curing time and sometimes as much as 24 hours before a newly made RTV gasket can safely be subjected to a load.
In practice, and even though the correct compound was used correctly on properly prepared surfaces, many fluid leaks recur simply because the sealant or gasket maker did not have sufficient curing time before the joint was loaded.
Exposing water-based anaerobic sealing compounds to fuel
The two main classes of automotive RTV sealants and gasket makers are those that are water-based, and those that are solvent-based, and each type or class of sealant has specific uses and applications. It should be noted therefore that only sealants and gasket makers that are solvent based must be used in situations where the joint is exposed to fuel, including diesel / biodiesel and even some synthetic oil formulations, since these substances will attack and dissolve almost all water-based RTV sealants.
Applying too much of a good thing
Many mechanics make the mistake of thinking that if a little of the correct sealant is good, double the amount must the twice as good. However, the fact is that in situations where no physical gasket is required, the sealant between mating surfaces is only required to fill the gaps between the mating surfaces. In practice, these gaps can be as small as a few hundredths of a millimetre, which means that upon tightening, excessive amounts of sealant is squeezed out of the joint, and into the engine. Once cured, the blobs of sealant inside the joint can shear off, and clog oil and water passages when they are transported by circulating oil or coolant.
Thus, when you are in doubt about the correct amount of sealant to apply, err on the side of caution, since it is easier and cheaper to fix the leak again, than it is to replace or rebuild an engine that was destroyed by a migrating blob of cured RTV sealant, which brings us to-
You may not have known this, but even automotive engineers and physicists are not quite sure how oil seals manage to prevent oil from escaping past them on rotating shafts. What is known however is that once a shaft starts to rotate inside a seal, capillary action establishes a thin layer of oil between the seals’ sealing lip and the rotating shaft, which layer is maintained for as long as the shaft rotates, assuming that the seal is located squarely on the shaft. As a practical matter then, the seals’ sealing lip is not in direct contact with the shaft, but is separated from it by a film of lubricating oil.
So, given the above, why do oil seals leak, and why do their replacements also sometimes start leaking within days, or sometimes, almost immediately? This is a good question, but it seems that while how well (or otherwise) this film of oil is maintained depends on several factors, the single most important aspect involves the smoothness of the shaft at the point where the oil film forms.
We have all seen bright, shiny, and highly polished rings on shafts at the point where the oil seal is located, and it would be reasonable to assume that the smoother this contact point is, the better the seal would work. However (and somewhat counter intuitively), it turns out that for an oil seal to work, the shaft must have a degree of roughness, or a specific Ra finish, which varies according to the shaft’s diameter.
In practice, the tiny pits in the surface between the shaft and the seal act as tiny reservoirs that hold minute quantities of oil. Engineers think that the oil’s surface tension and/or shear strength causes these small amounts of oil to be dragged around the shaft between the shaft’s surface and the seal’s sealing lip, thereby creating and maintaining the lubricating film.
As a practical matter then, the smoother the area is where the seal lip runs on the shaft the less oil can be dragged around the shaft, and since less oil equals more friction, the sealing lip eventually touches the shaft, and rapid wear of the lip ensues. This wear is then accelerated by particulate matter in the oil, which eventually leads to a leaking oil seal, which brings us to-
There is no doubt that gasket makers and/or sealants produced by reputable manufacturers can be used to make reliable repairs, but the difference between a reliable repair and a comeback lies in understanding the limitations of each specific product. Therefore, it is essential to stick to one brand, and to study the relevant product and data sheets with regard to recommended applications and uses. By making appropriate choices, it is possible to resolve recurring fluid leaks permanently but to do so we need to understand that when it comes to fluid leaks, there is no such thing as a one-size-fits-all solution.
